The Ultimate Setup Guide for Your Aorus AD27QD
The Aorus AD27QD entered the market as a self-proclaimed "Tactical Monitor," a branding choice by Gigabyte that initially raised eyebrows among hardware enthusiasts. However, beneath the marketing jargon lies one of the most versatile and high-performing displays of its generation. Combining a 1440p resolution, a 144Hz refresh rate, and an IPS panel with 10-bit color depth (8-bit + FRC), it bridges the gap between competitive gaming and professional creative work. Setting up a display with this many features—ranging from Active Noise Cancelling (ANC) in the monitor itself to complex OSD Sidekick software—requires more than just plugging in an HDMI cable. This guide provides a comprehensive roadmap to getting the most out of this sophisticated piece of electronics.
An In-Depth Performance Analysis
The core of the Aorus AD27QD experience is its 27-inch In-Plane Switching (IPS) panel. For years, gamers had to choose between the speed of TN panels and the colors of IPS. The AD27QD was among the vanguard of displays that proved you could have both. With a 2560 x 1440 resolution, it hits the "sweet spot" for 27-inch displays, providing a pixel density of approximately 108 pixels per inch. This ensures that text is crisp for office work while gaming environments feel immersive and detailed without requiring the massive GPU horsepower of 4K.
What differentiates the AD27QD from its peers is the implementation of 95% DCI-P3 color gamut coverage. This is significantly wider than the standard sRGB gamut found on budget displays. For the user, this means deeper reds, more vibrant greens, and a general sense of "pop" that makes HDR content look noticeably better than on entry-level monitors. However, this wide gamut can sometimes lead to oversaturation in Windows, which is why proper software calibration is a crucial step in the setup process.
The "tactical" features are the second pillars of this monitor's identity. These include an integrated crosshair, an on-screen timer, a frame rate counter, and "Black Equalizer" technology. Unlike software-based overlays that might be flagged by anti-cheat systems, these are processed hardware-side by the monitor itself. The Black Equalizer is particularly effective in competitive shooters like Escape from Tarkov or Counter-Strike, where it brightens dark corners without blowing out the highlights in brighter areas of the map.
Physical Installation and Ergonomics
Unboxing the AD27QD reveals a heavy, V-shaped stand that offers impressive stability. Setup begins with the tool-less installation of the stand to the panel. The stand supports height adjustment, tilt, swivel, and a full 90-degree pivot for vertical orientation. Note that when pivoting to portrait mode, it is best to tilt the monitor back slightly to avoid the corners hitting the desk surface.
One detail often overlooked is the cable management loop built into the stand. For a clean desk setup, route your DisplayPort 1.2 and USB upstream cables through this loop before connecting them. To utilize the 144Hz refresh rate and 10-bit color simultaneously, DisplayPort is mandatory. While the monitor has HDMI 2.0 ports, they are bandwidth-limited compared to the DisplayPort connection, especially when considering G-Sync compatibility or FreeSync functionality.
Specifications and Comparison
To understand where the AD27QD fits into a modern desktop environment, it is helpful to compare its functional specifications against common industry standards for mid-to-high-end displays.
Shop the latest Electronics picks on Amazon.
View Offers →| Feature | Aorus AD27QD Standard | Common Entry-Level IPS | High-End TN Panels |
|---|---|---|---|
| Resolution | 2560 x 1440 (QHD) | 1920 x 1080 (FHD) | 2560 x 1440 (QHD) |
| Refresh Rate | 144Hz | 60Hz - 75Hz | 144Hz - 240Hz |
| Color Depth | 10-bit (8-bit + FRC) | 8-bit | 6-bit + FRC |
| Color Gamut | 95% DCI-P3 | 99% sRGB | ~90% sRGB |
| Response Time | 1ms (MPRT) | 5ms - 8ms (GtG) | 0.5ms - 1ms (GtG) |
Optimization and The OSD Sidekick
Most monitors require users to faff about with clunky buttons on the bottom of the bezel. The AD27QD uses a single joystick for OSD navigation, which is a major improvement, but the real power lies in the OSD Sidekick software. By connecting the included USB upstream cable from the monitor to your PC, you can control every monitor setting—brightness, contrast, tactical features, and RGB lighting—directly with your mouse and keyboard.
For a perfect setup, users should create different profiles within the OSD Sidekick. For example, a "Productivity" profile might lower the brightness to 120 nits to reduce eye strain and set the color temperature to "Warm." A "Gaming" profile could enable the 144Hz refresh rate, set 'Aim Stabilizer' to on (which reduces motion blur through backlight strobing), and increase the 'Vibrance' setting to make enemies stand out in the environment.
A specific feature to test during setup is the Active Noise Cancelling (ANC). If you plug your headset into the 3.5mm jack on the monitor, the AD27QD uses a dual-microphone array on the front of the bezel to cancel out background noise like mechanical keyboard clicks or fan whirring. This is a game-changer for those who find themselves in loud environments while using Discord or in-game voice chat.
Who Should Look Elsewhere?
Purely competitive professional players who only care about motion clarity and frame data might still prefer an ultra-high-refresh TN panel (like a 240Hz or 360Hz model). TN panels lack the beautiful colors of the AD27QD but offer slightly better "Ghosting" performance. On the other end of the spectrum, if you are a "Cinematic Gamer" who exclusively plays single-player RPGs at the highest possible fidelity, you might want to save for a 4K 60Hz IPS or an OLED display to maximize image immersion at the cost of refresh rate.
Value Considerations
In the electronics market, monitors are often an investment that outlasts the CPU or GPU. When buying, ensure the warranty covers "Bright Sub-pixels." Gigabyte typically offers a robust warranty for its Aorus line, but checking the specific dead-pixel policy at your point of purchase is a wise move for any display over 24 inches.
Find top-rated Electronics products at great prices.
Browse Now →Advanced Calibration Steps
To truly finalize your setup, move beyond the factory presets. Out of the box, the "Standard" mode is often set to a high brightness that can cause eye fatigue. For a balanced environment, set the brightness to approximately 30-40%. This usually lands the display around the 120-140 nits range, which is standard for a moderately lit room.
Next, address the color temperature. Many monitors ship with a "Cool" bias to make the whites look "whiter" in a showroom, but this creates a blue tint that is inaccurate. Switching the color temperature to "User Define" and subtly adjusting the RGB gains (often slightly lowering the Blue channel) can result in a much more natural white point of 6500K.
Lastly, ensure that Windows is correctly identifying the bit depth. Navigate to Display Settings > Advanced Display Settings and verify that the "Color Depth" is set to 10-bit. If you are limited to 8-bit, check your cable (it must be DisplayPort) and ensure your GPU drivers are up to date. This extra bit depth is what prevents "banding" in skyboxes or gradients in high-quality video content.
Managing the RGB Lighting
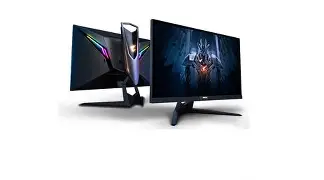
The back of the AD27QD features several zones of RGB lighting, controllable via RGB Fusion 2.0. While RGB on the back of a monitor might seem redundant, it can actually serve as effective "bias lighting." By setting the LEDs to a static white or soft blue color, you can reduce the contrast between the screen and the wall behind it, which significantly lowers eye strain during night-time use. The Aorus implementation is particularly sleek, as the "Falcon" wings on the backplate provide a diffused glow rather than harsh, direct light points.
Conclusion
The Aorus AD27QD is a testament to how far display technology has come. It is no longer necessary to sacrifice color for speed or utility for aesthetics. By taking the time to properly install the stand, route cables through the ergonomic loop, and dive into the OSD Sidekick for fine-tuned calibration, the user unlocks a tool that is as capable of helping them win a match as it is helping them edit a professional video. It remains a benchmark for what a 1440p gaming monitor should provide: a balance of high-end specs, meaningful tactical features, and a premium build quality that justifies its place at the center of a modern workspace.